Sunday, 8 February 2015

New Look 6022, again!

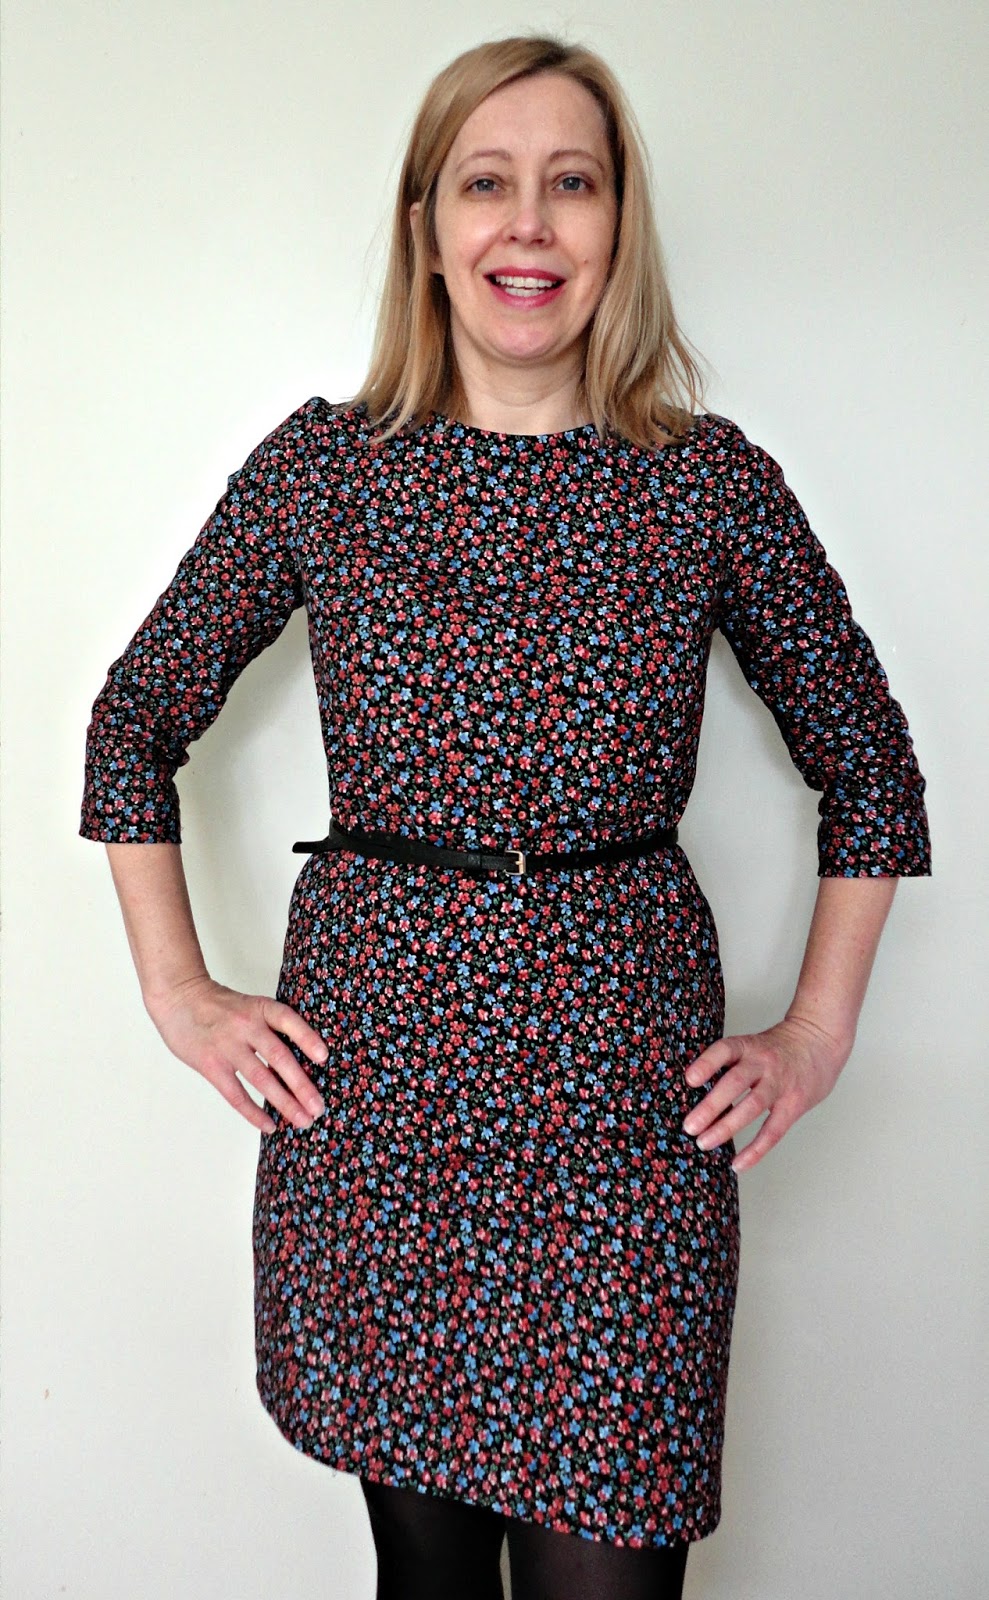
This is my second version of this dress.

New Look 6022


I wrote about my first version here.  This was the first dress I ever made, and I didn't get the fit quite right so thought I would try it again.  This time I made a straight size 14 and its a much better fit!


This time, I chose view B with the cap sleeves as I wasn't very keen on the sleeves in my first version. I also decided to make the fabric belt from view C as without it I was worried it might look a little sack-like, especially from behind.


The dress has a self bound neckline and  neck pleats to give it some shaping. The armholes are neatly bound with bias binding tape. The cap sleeves are pleated, and a really flattering shape.

New Look 6022

New Look 6022


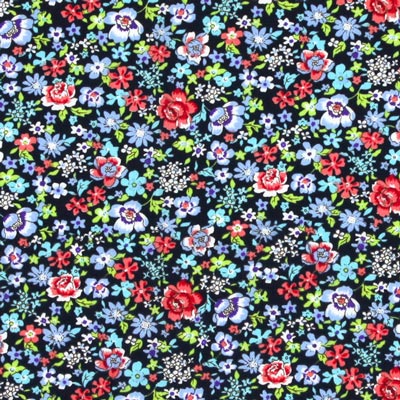
The material is a black cotton poplin purchased from Minerva crafts sometime ago. It's nice to sew with and is a medium weight woven fabric.  It's still available to purchase. 


I'm getting better at taking the cheesy self photographs. I am hoping to get a new camera soon. 

New Look 6022

New Look 6022

It's a little baggy at the back, but I suppose that is the style of the dress.

New Look 6022

The belt is a good addition, and improves the look from behind!

New Look 6022


It also looks nice belted from the front I think too. 

New Look 6022

New Look 6022

New Look 6022

I'm much more pleased with this version of the dress as this one isn't too tight for me. I just need some warmer weather to wear this in as it's a perfect little summer dress. I'd recommend this pattern to anyone beginning sewing as it's really easy to follow. 

New Look 6022


Catherine x

Thursday, 29 January 2015

A Megan dress

Let me start by saying I love this dress.  I made this dress towards the end of last year, and am only just getting round to blogging it.


The dress is a flattering fitted shape, with a high waistline and a gentle A-line skirt.  The bodice has bust darts and dart tucks at the front and darts at the back.  It also has pretty gathered sleeves and has an invisible zip.


This is the third pattern I have made from the marvellous Tilly and the Buttons' book  "Love at First Stitch". As usual the pattern is clearly written with step by step photos and detailed instructions.  I found this a relatively easy make and I love the fact that Tilly clearly explains anything that you might be unsure about such as darts, or inserting an invisible zip.


The pattern recommends 1.5 metres of 150cm wide fabric, I squeezed this out of 1.2 metres with no problem. I used a 100 % cotton that I bought from myfabrics.co.uk. The fabric only cost me about £7 - bargain. I purposely used something inexpensive as I wanted to treat this as a "wearable" toile.


Tilly has her own system of measurements. I made size 4 based on my measurements and graded out to a size 5 in the hip area which I'm glad I did.  It's a fairly good fit apart from some gaping at the back of the neck. The bust is also a little tighter than in the image in Tilly's  book.


The gaping didn't appear to be a problem when I tried the dress on before inserting the invisible zip so I'm wondering if the material stretched out of shape when I inserted the zip? I also think that I need to tackle a full bust adjustment next time as discussed in my blog post here. I also have trouble reaching the top of the zip to do the dress up so not sure what fitting issue this indicates. Something to do with the position of the armholes? Any ideas?


The only head scratching moment I had when making this dress was when I could not get the bodice and the skirt to align at the darts, After half an hour or so, I finally figured that I had sewn the skirt back pieces to the front the wrong way up. Doh!


All in all this pattern is a winner, and I will definitely be making this dress again with a couple of adjustments.

Catherine x


Monday, 26 January 2015

A Sorbetto... and a lightbulb moment.

I decided to tackle something quick and easy as a distraction from the fitting issues I am currently having with the vintage pattern that I am sewing that I posted about here.

I chose the Sorbetto by Collete patterns  as I've seen so many versions of it and it looked very quick and easy.  It's a free download that you can get here.

Collete Sorbetto

I used some material from my stash time that I picked up last time I went to Goldhawk Road. I think its a cotton lawn and was beautiful to sew with. I only had a metre so this top seemed perfect.


It's a great basic pattern and there are so many ways of adapting it, check out the flickr page for more versions.  It's clearly explained and is the perfect top for a beginner to get stitching on. The only thing I can say is that if you followed the cutting layout you would waste a lot of material. I folded my fabric so that the selvedges met in the middle rather than selvedge to selvedge.

Now this is where is gets interesting. I chose the size 10 based on my body measurements. (This is not a UK size 10 by the way). I include a link to the size chart  if you are interested in the sizing for Collete patterns.  I downloaded the free pattern and printed it out and stuck it together. This is the first time I have done this and actually it was not as bad as I expected. Bearing in mind, I normally trace all my patterns, I think this has to be slightly quicker for me and it was nice not cutting flimsy tissue paper.  The only change I made was adding a couple of inches to the bottom of the pattern as a lot of the blog posts I've read about this top said it came up very short.


Once the top was put together, I tried it on and found the armholes were really gaping and the back was a bit loose.  A quick google search on gaping armholes, helped me discover where I've been going wrong all this time getting tops to fit me.  By making tops and dresses to my bust size, the rest of the top is often too large for my frame. In the past I have combated this by removing fabric from the back seam, as I did for New Look 6356. This is exactly the problem I'm having with my vintage dress and I have currently had to rip the zip out, hence the reason for putting it to one side. 

All this time I should have been looking at my high bust measurement which is between four to five inches less than my full bust measurement. It seems I need to start doing a full bust adjustment to the pattern pieces before I even start! Most patterns are drafted to a B cup although Collette patterns are drafted to a C cup. This means if the difference between your high bust and your full bust is more than 2 inches on a pattern drafted for a B cup, you need to do a full bust adjustment!  I don't really class myself as having that big a bust, and always presumed that full bust adjustments (otherwise known as FBAs) were for the really large and busty amongst us! Seems I'm wrong.  Looking at my high bust measurement, I should have cut a size 4 and then done the full bust adjustment.

For those of you wanting to try a FBA on the Sorbetto top, I found this very useful tutorial on I could make that. Another method for solving the armhole gape seems to be pivoting an armhole dart in to the bust dart, see this excellent post on Makery.

I also found this excellent tutorial on how to fix a gaping armhole by inserting a dart into a top without a dart at Sew Country Chick using the above method which I will certainly be referring to again.

Hmm this is really a lot to be thinking about... It's too late for this particular Sorbetto top but certainly worth seeing if I can fix it for next time using the FBA method.

An inside view. Neat huh. 

All  in all, it's a lovely top and it's just a shame the fit isn't that great. I can still wear it and the armhole gape isn't as bad as it was before the bias binding was added. I'm particularly pleased with the sewing I did on this top as I finished it beautifully with French seams. I didn't have one of those bias binding gadgets so I didn't make proper bias binding, just pressing the edges under when finishing the bias binding so that the bias tape measured exactly one inch. I achieved a good finish this way and I'm converted to making my own bias tape as it's much softer than shop bought tape and it isn't that difficult to make.

Front pleat and neck bias

The final lesson I've learnt from making this top is that muslins may seem like a lot of extra effort but I think I need to start making them! It's worth testing your pattern out so that can make any necessary adjustments before cutting into your expensive fabric.

So I think I will be treating myself to a couple of books about using and adapting sewing patterns to get a better fit. Any good recommendations? 

Do you always make a muslin? Or any other good tips? 

Catherine x

Thursday, 8 January 2015

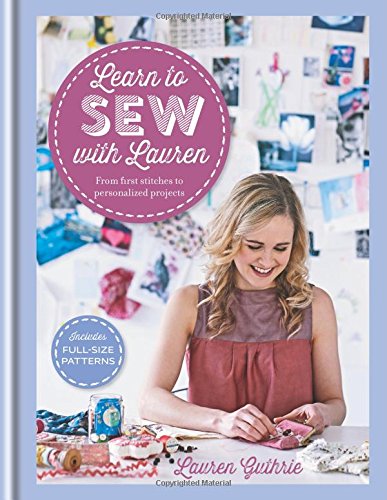
Learn to Sew with Lauren - A Review

As promised here is my review.  Learn to Sew with Lauren is a gorgeous book by the series one Great British Sewing bee contestant, Lauren Guthrie.


I have to say this is one of my favourite sewing books so far. I'm a fan of Lauren's blog and was really pleased when I received this book from Father Christmas.


The book contains a mix of projects including home furnishings, bags and clothing. It is aimed at the beginner sewer but I think that it would appeal to more experienced sewers too as the projects are all so lovely. The book comes with full size patterns which is pretty essential I think, as no one likes downloading a pattern they want to make and then  having to stick it together.  Yes, you do have trace the patterns out, but I do that anyway in most cases as it means you can re-use  your pattern over and over again, making different sizes when needed. Cutting layouts and sizing are included in the back of the book.

The book starts with a techniques section which I think is really well done. Lauren gives lots of detailed information in this section which would be essential for a beginner such as selecting fabrics and how to use sewing patterns.  She shows you  to master essential sewing and dressmaking skills such as inserting a zip, hemming, using bias binding, inserting piping and how to set in sleeves.  I thought this section was really well illustrated, with the steps broken down clearly.


The second section of the book focuses on a range of different projects.  The projects included in the book  are totally gorgeous and really inspiring. One of my aims for 2015, is to try making some different things, and I can really sew myself tackling some of the projects in this book. Lauren has sorted the projects in to four sections - beginners (easy peasy), beginners - moving on, improvers - next steps and improvers - tricky. There is a real sense of progression and I can see a total beginner working their way through the projects in this book and learning new skills as they go.


The projects included in this book are:

Envelope cushion cover
Simple tote bag
Bow belt
Placemats and napkins
Sleeveless top
Patchwork quilt
Oven gloves
Girl's summertime set
Trimmed cushion cover
Neckerchief
Snapframe purse
Cook's apron
Roman blind
Weekend bag
Boy's shorts
PJ bottoms
Yoke top
Pick your pockets skirt
Ribbon handbag
Have it your way dress


I'm really impressed with this book from Lauren. The book has been beautifully put together and you can tell she is really passionate about sewing.  The book is good value for money due to the number of projects included and I can certainly see myself tackling some of the projects, in particular I'd like to have a go at some of the home furnishings such as the envelope cushions and the placemats/napkins and even the simple patchwork quilt.


Thursday, 1 January 2015

2014 - A Review of the Year

I hope you all have had a great Christmas and New Year, I certainly have! Father Christmas was certainly kind to me this year, bringing me a walking foot for my machine, and the gorgeous book "Learn to Sew with Lauren" which I think I will write a review on shortly.


So 2014 has been a busy year. I started sewing seriously at the end of 2013 and I started this blog in May as I enjoyed reading all the other blogs out there and thought it would be nice to share my makes too and connect with other sewers. I've really enjoyed blogging my makes although to be honest I've found it hard to fit the blogging in with work and family commitments and I have a slight backlog now of finished garments! I have also found the photography aspect very challenging, so that's something I want to work on in 2015.

So what have I sewn this year? 

My makes in 2014

Three pairs of pajama bottoms
Two Cocos (one as yet unblogged)
Megan dress (as yet unblogged)
Deer and Doe, Reglisse (unblogged as yet. A Xmas present for my daughter)
One knitted cardigan
Delphine Skirt
Two Simplicity 1693 (one blogged and one unblogged)
New Look 6035 (unblogged as yet)

That's quite a bit of sewing!

The make I'm most proud of is  New Look 6022 as this was quite technically challenging for me, plus my daughter has worn it loads!


My most worn garments have to be Simplicity 1693. A great wardrobe basic and I will be making more in 2015 I'm sure.


My least worn garment, unfortunately has to be the Mimi blouse. I've never worn it since I made it. It just doesn't go with anything else I own or maybe just isn't my style.


My aims for 2015

1) To sew more wardrobe basics.  I want to concentrate on making some things that I can wear on a daily basis.

2) To use up some of my fabric and knitting yarn stash. Although I've only been sewing seriously just over year, I've managed to accumulate a fair bit of fabric and I already have a lot of yarn waiting to be knitted up. 

3) To plan my sewing projects in advance and buy fabric as I need it. Hmm this one could be tricky!

4) To try sewing other things rather than just clothes. Got lots of ideas some of which I've been adding to Pinterest.

5) To tackle some of the vintage patterns I've bought.

6) To fit time in to blog at least twice a month. That seems manageable to me. 

And finally all that remains for me to say is thank you to anyone who has read my blog in the past year or left any comments for me. I've loved hearing from you and being part of the online sewing community.

Best wishes for 2015!

Catherine x

Monday, 17 November 2014

Coco

This is my first Coco dress and my first go at sewing with knit fabric.

Coco dress - Tilly and the Buttons


The pattern is by Tilly and the Buttons. The pattern comes with a detailed  instruction booklet with which includes lots of useful tips and hints. All the steps are illustrated with a photograph. It includes details of how to make either a top or dress, with the option to add cuffs, pockets or a funnel neck.


Coco is designed to be fairly easy fitting, so is a flattering outfit for all body shapes as it skims over the hips and is not too clingy. I made the size 4 based on  my measurements, grading to the size 5 on the hips (as usual). I decided to make the dress version with the full length sleeves and cuffs. I also chose the small pockets to add to the front of the dress. I lengthen the pattern by 5 cm as I thought it would be a bit short on me although when it was all sewed up, it was actually looked too long. I lopped off a fair bit so the dress is probably near the original length.

Coco dress - Tilly and the Buttons

I chose a quite heavy weight double knit which was fairly easy to sew as it didn't  have too much stretch. I don't know too much about the material as it was a bargain that I picked up at the Knitting and Stitching Show last month. I pre-washed the fabric and it  seems to wash quite well.  I deliberately chose something plain to work with as I didn't want to pattern match.

Coco dress - Tilly and the Buttons

The one thing I found tricky was the placement of the pockets as there are no markings for this on the pattern. I can understand why there are no markings, as with all of Tilly's patterns, she's keen to encourage you to make your garment your own. However, I would have preferred to have markings on the pattern for the placement of the pockets, that I could choose to ignore if  I wished. I found it very difficult to pin the pockets in the correct place. When I was happy, I then tacked the pockets first to make them easier to sew in place. In the end, I unpicked and removed the pockets as they made the garment look distinctly homemade. I do like the pockets on all the versions I've seen online but mine were just not neat enough. I would steer clear of the pockets if your top stitching can be a bit wonky like mine.

Coco dress - Tilly and the Buttons

I would like to look at how to finish the dress more professionally as to be honest it's a bit of a mess inside. Tilly suggests in one of her tips to stitch or fuse stay tape or hemming tape to the neckline and hemline to give a neat and strong finish.  She doesn't go in to any more detail about this in the pattern booklet so this is something I will have to investigate as I've never heard of either before.

All in all, I'm pleased with my Coco and will be tackling it again.  It's a quick and easy make and perfect for this time of year.  My new dress is nice and warm, and perfect for a cold day with tights and boots.  I've also discovered that knits aren't too scary for beginners!

Have you got a favourite knit pattern that you could recommend?

Catherine x

Monday, 3 November 2014

The Ultimate Shift Dress

So the first of my Autumn-Winter Stitching plans is now complete!

Ultimate shift dress - Sew Over It

This is the Ultimate Shift Dress by independent sewing pattern company Sew Over It.  The fabric was something I picked up at the Knitting and Stitching Show.

Ultimate shift dress - Sew Over It

This is a very easy dress to complete. In fact I think it is the fastest thing I have ever sewn. I traced the pattern pieces one evening and then cut and sewed most of the dress the next evening.

Ultimate shift dress - Sew Over It


This is a good pattern for a relative beginner like me and the instructions are quite clear. I think it's not suitable for a total beginner as it assumes a bit of knowledge such as how to sew bust darts and the sleeves are eased in which is quite tricky.However, the pattern booklet includes a glossary which is helpful as it explains some of the terms that other patterns assume you know and understand.

The pattern comes in size 8-20.  Looking at my measurements, I was between the 12 and the 14 sizes. This pattern is designed for a very close fit and includes less ease than more commercial patterns. I traced a size 12 and graded to 14 on the hips.  Thank goodness for machine tacking as when I tried it on to see what the fit was like, the dress was far too tight on  the hips for my liking.  I had to sew from the waist downwards with a very tiny seam allowance.  I will have to grade to a 16 on the hips next time I think!

I made the long sleeved version due to the season. I started with wrist length sleeves but altered them to three quarter length after trying the dress on. The dress is finished with a simple hook and eye but you could easily make a button loop instead.

Ultimate shift dress - Sew Over It

I like the simplicity of this pattern and also love the fact that not only can you make three versions of the dress (long sleeved, with sleeve frills and with a neck frill), cutting lines are also marked on the pattern for making a tunic or a top version instead. I think that to get a better fit though at the back, I would need to look at making a shift dress with some darts to give it more shaping.

It's a great basic pattern though and I will definitely be checking out some of their other patterns.

Catherine x


Popular Posts